
How to sow and grow climbing courgette
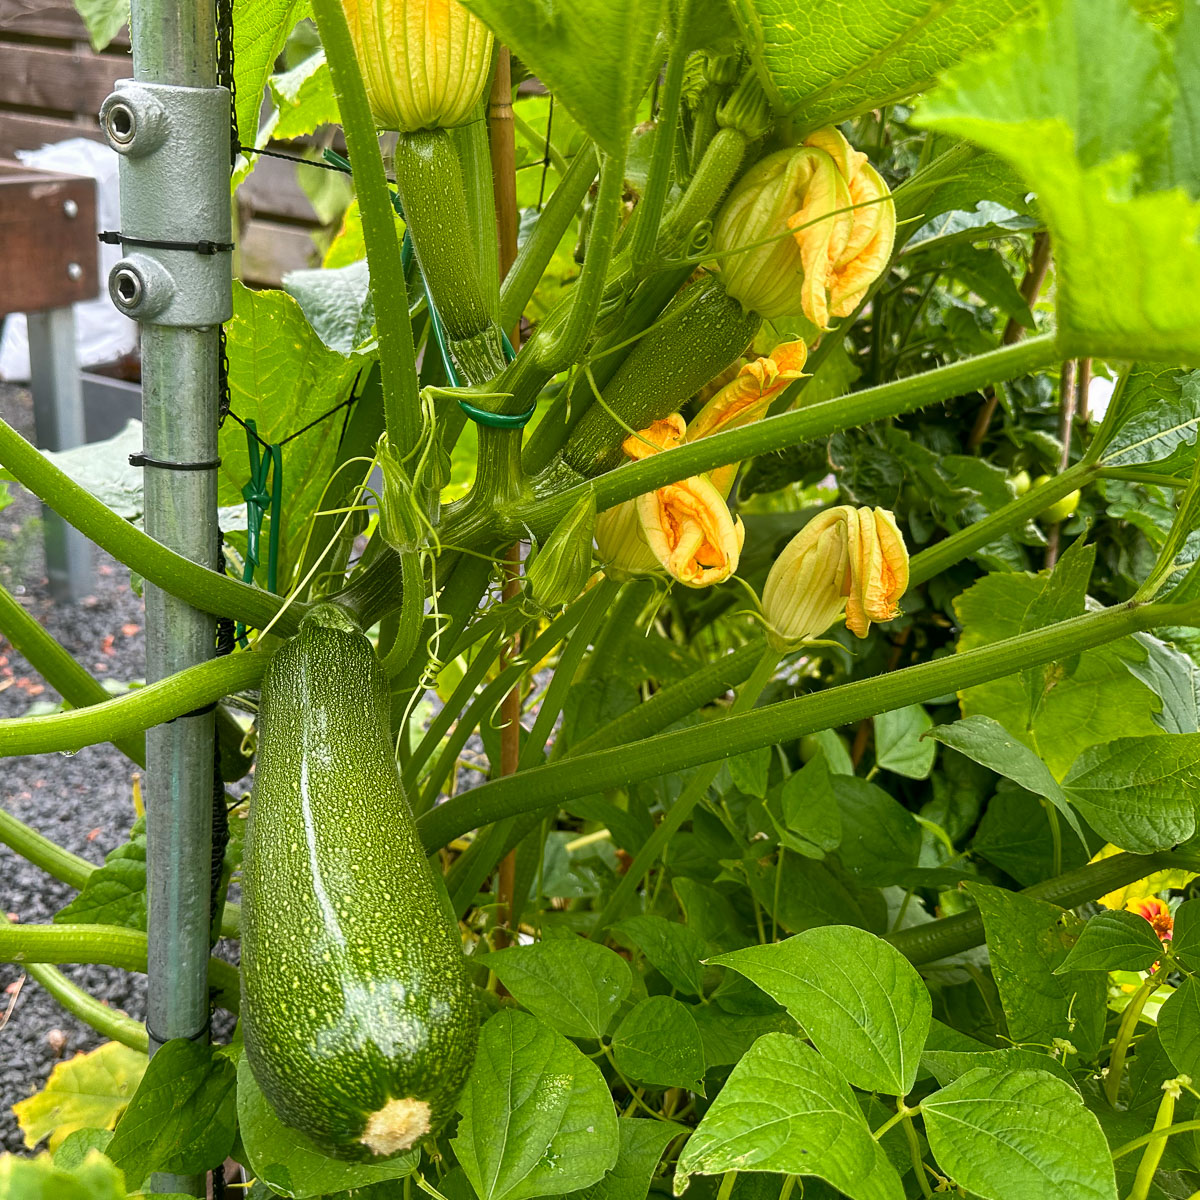
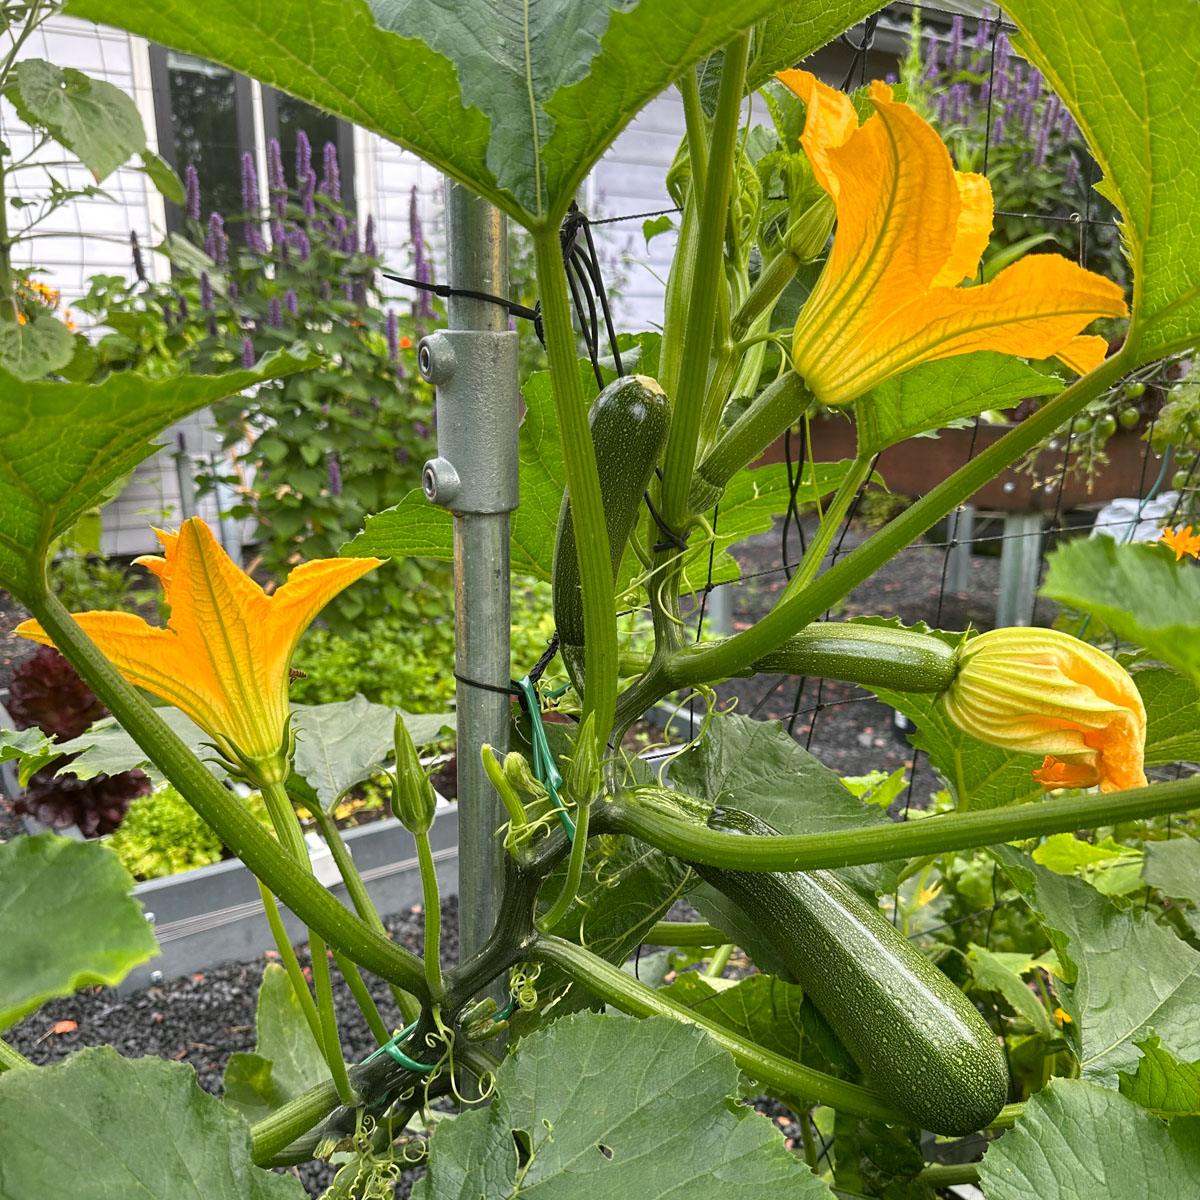
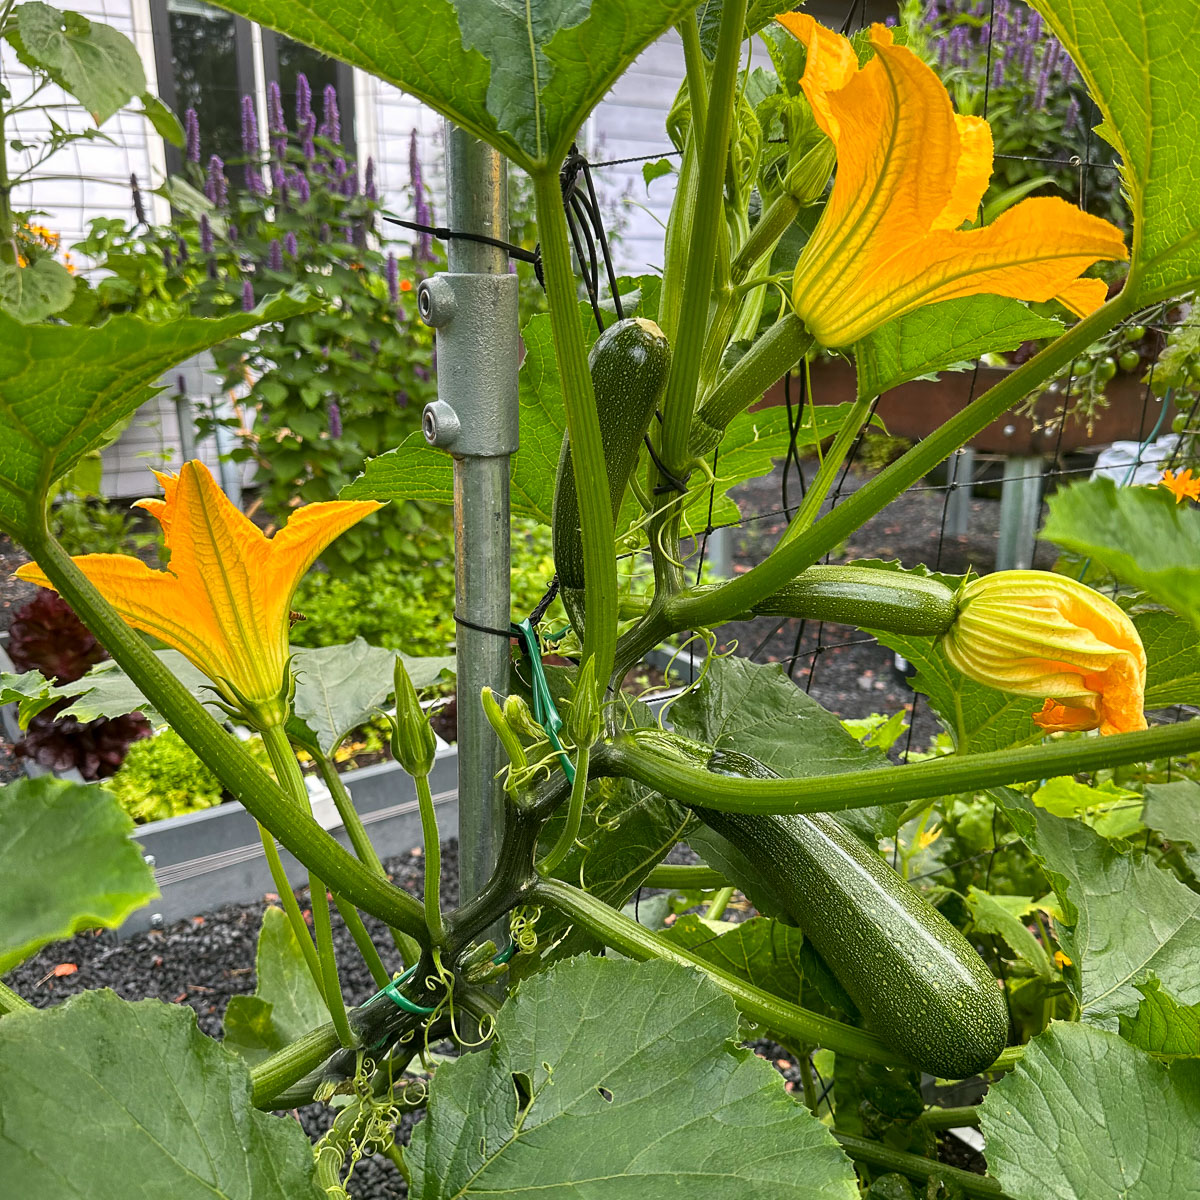
This courgette is one of the few varieties whose stem can be tied up a trellis. That means it also fits in a raised bed.
The yield is enormous: from early July until late October, you can harvest one courgette after another.
The yield is enormous: from early July until late October, you can harvest one courgette after another.
About our climbing courgette
This courgette is one of the few varieties whose stem can be tied up a trellis. That means it also fits in a raised bed.
- Variety: Black Forest F1
- Family: fruiting vegetables
- Plants per square: 1 by the trellis
- Height: up to 200 cm
- Start indoors: from late April to late May
- Germination: 4 to 10 days at 20 to 25°C
- Time to harvest: from 9 to 10 weeks
- Sunlight: needs a sunny spot
- Packet contents: 4 seeds, enough for 4 squares
- Yield: 10 to 37 courgettes per plant
Courgette is a true summer vegetable and cannot cope with cold. The seeds germinate at 20 to 25°C, so start them indoors and only put the plant outside from late May at the earliest.
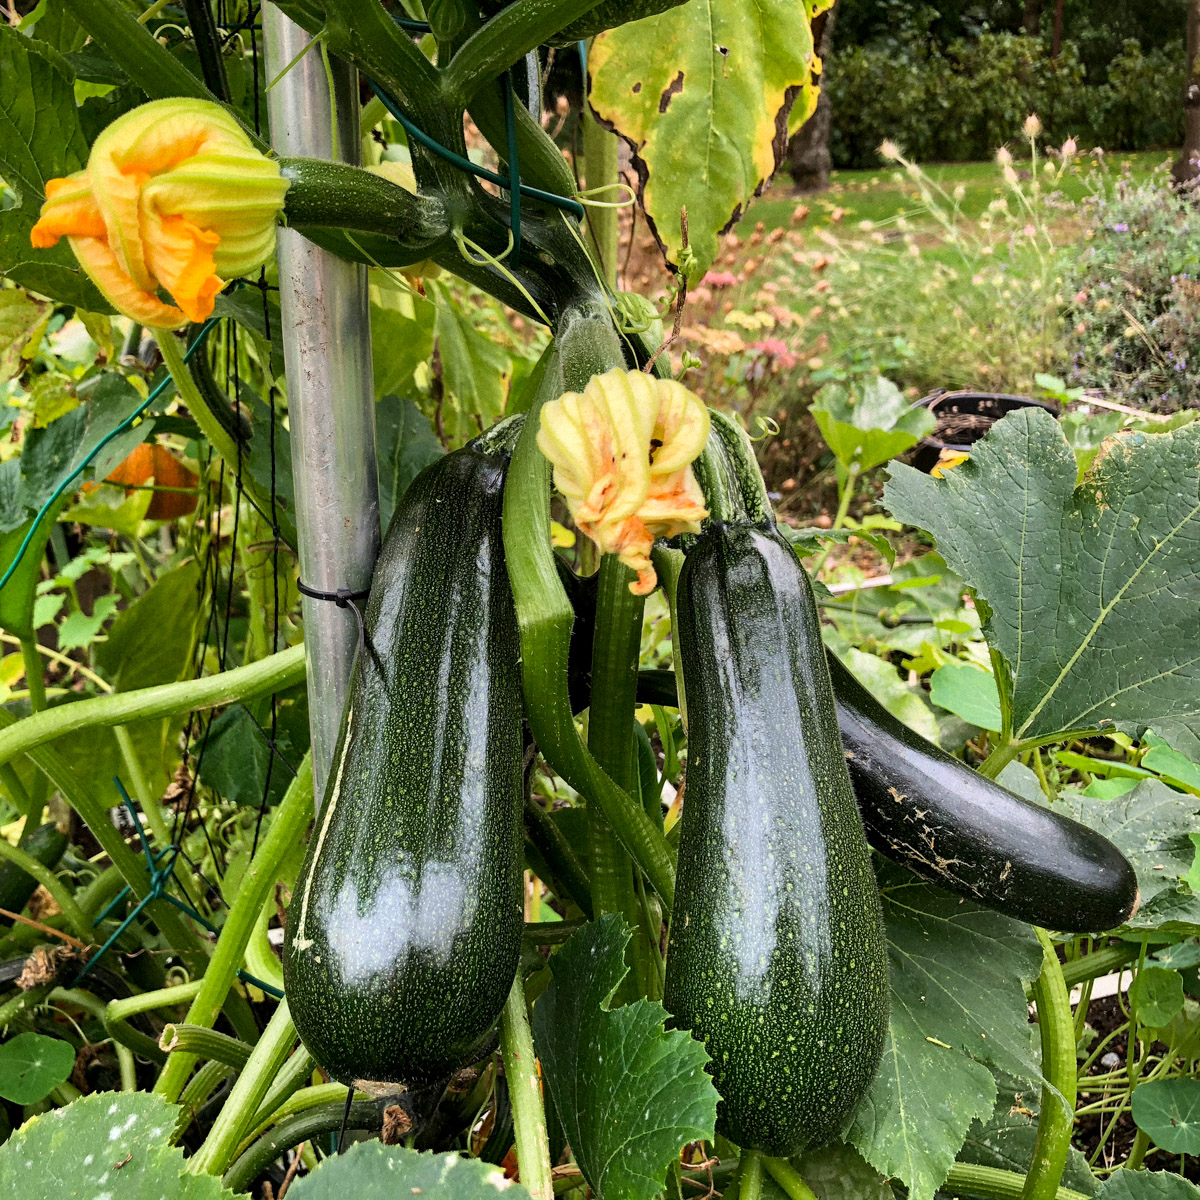
This variety was developed for professional growers: compact, easy to guide upwards, and very productive. The plants get huge in a cold greenhouse, but also do very well outdoors.
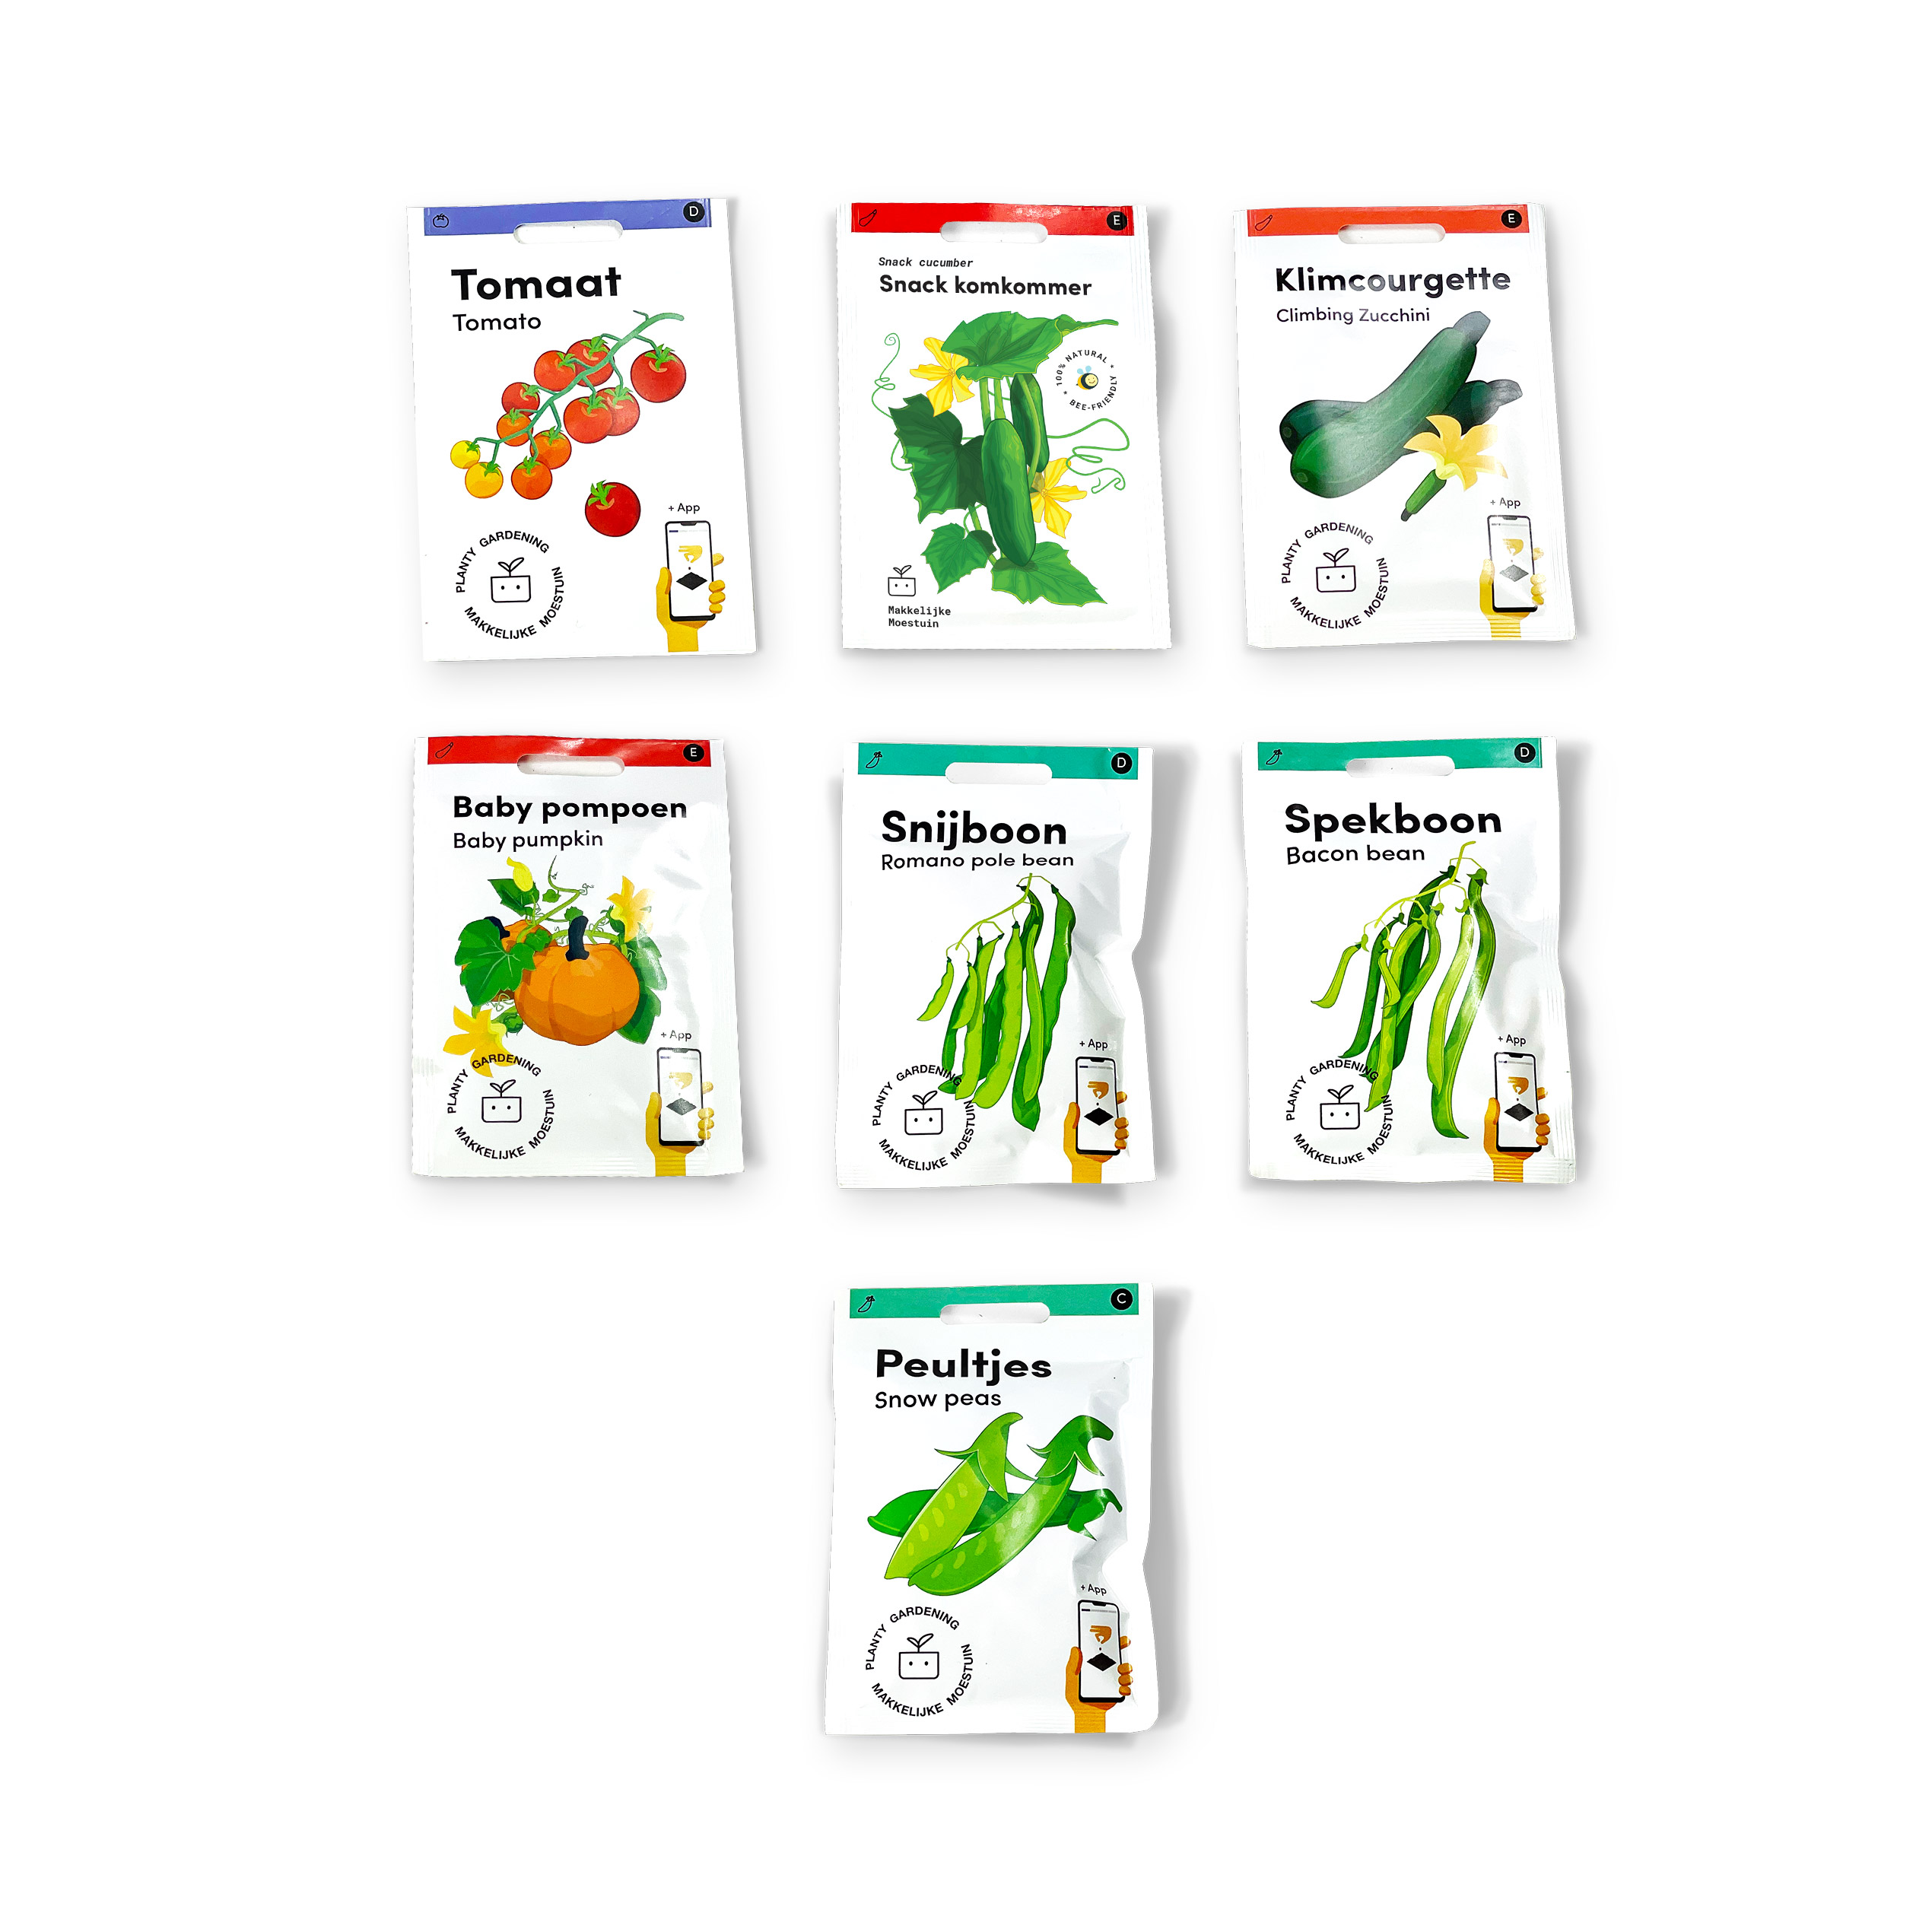
This climbing courgette is also included in the climbers seed package:
This climbing courgette is also included in the climbers seed package:
What is a climbing courgette?
Most courgette varieties take up a huge amount of space: at least 9 squares. That makes them too large for a raised bed.
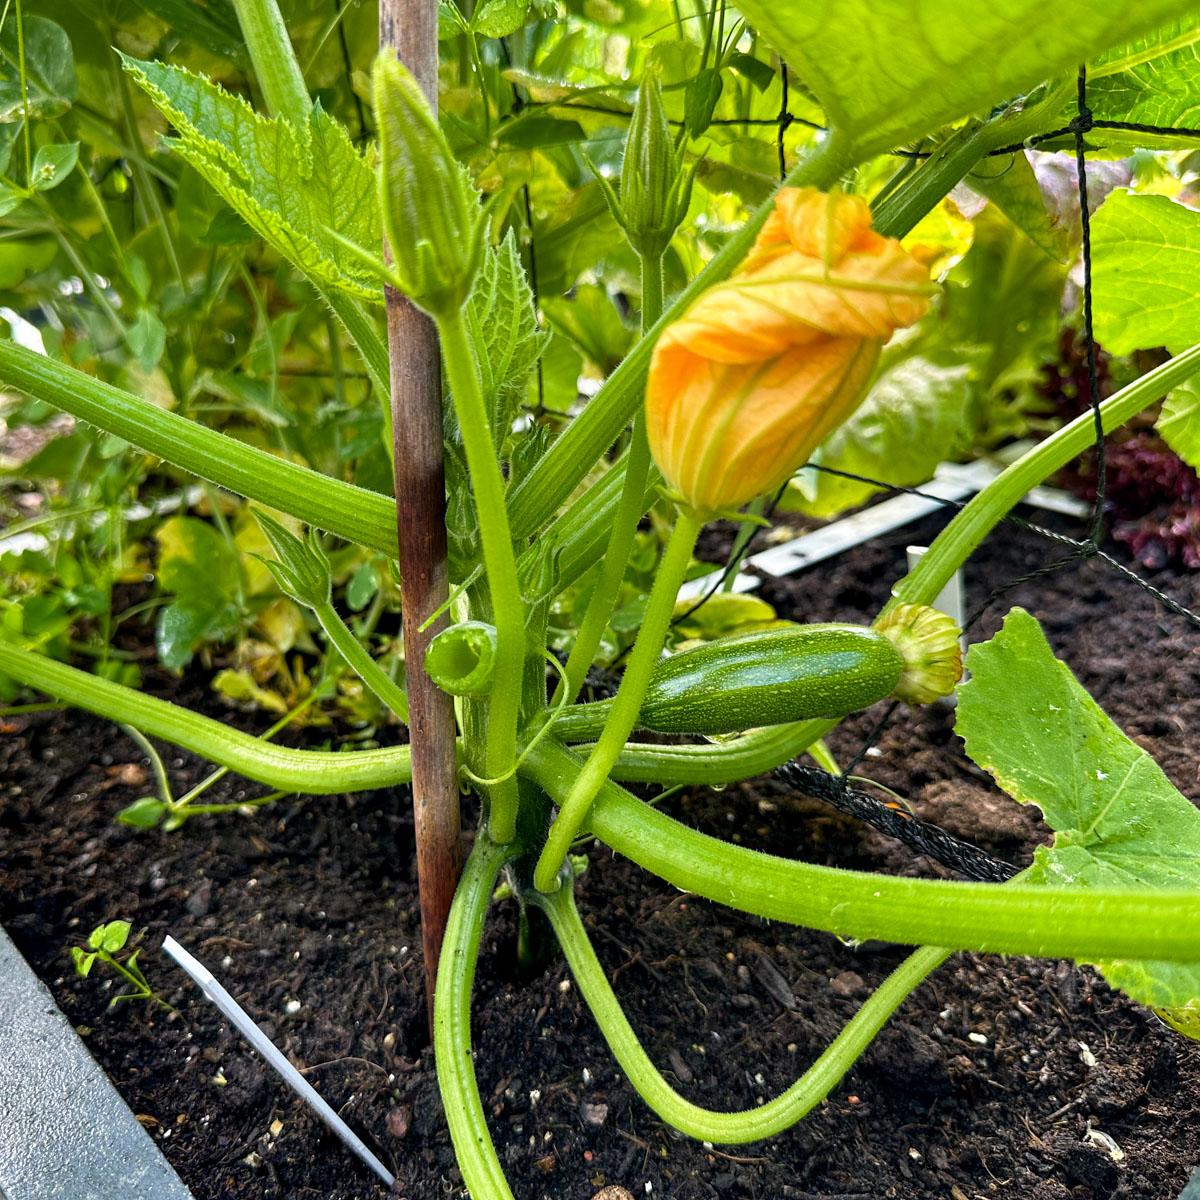
A climbing courgette develops a long stem that you can guide up a trellis, so the plant takes up much less room.
This variety was developed for professional growers: compact, easy to train upwards and very productive. The plants become enormous in a cold greenhouse, but also grow very well outdoors.
Courgette, also known internationally as zucchini, is a summer squash harvested while its skin is still tender and edible. Like pumpkins, it belongs to the fruiting vegetable family.
A climbing courgette develops a long stem that you can guide up a trellis, so the plant takes up much less room.
This variety was developed for professional growers: compact, easy to train upwards and very productive. The plants become enormous in a cold greenhouse, but also grow very well outdoors.
Courgette, also known internationally as zucchini, is a summer squash harvested while its skin is still tender and edible. Like pumpkins, it belongs to the fruiting vegetable family.
On some varieties you see the label F1. That means they are hybrid seeds: the result of careful plant breeding.
Seed growers do this to strengthen or soften certain traits in a variety. That might mean better performance in warmer, colder, drier, or wetter weather. It can also mean a more even appearance, a bigger harvest per plant, or better flavour.
By crossing and selecting varieties over and over again, growers strengthen the traits they want and reduce the traits they do not want. Often, that also makes the plants more resistant to certain diseases.
So bred varieties are not scary or unnatural. Growers who work fully organically develop them too.
You can read more here: what does F1 mean on seed packets?
What do you need to grow climbing courgettes?
Besides the seeds, you need the following to start them indoors:
- MM seed-starting mix or MM coconut seed-starting mix
- large MM Airpots
- clear kitchen film, unless you use coconut mix
Once the plant is large enough to go outside, you need:
- one 30 × 30 cm square
- Makkelijke Moestuinmix or MM coconut mix
- a spot with at least 8 hours of sunlight a day
- an MM trellis, or similar support
- MM plant food
How do you sow and grow climbing courgette?
This courgette variety is included in the free Makkelijke Moestuin app. Use it, and you get step-by-step guidance from seed to harvest.
Each vegetable goes through a number of stages: we call them levels. The app tells you exactly what to do at each level and checks in when your plants are ready for the next one.
So you do not need to know how to grow courgette before you start: the app takes you through every step.
For the full product details, see the climbing courgette in the shop.
Each vegetable goes through a number of stages: we call them levels. The app tells you exactly what to do at each level and checks in when your plants are ready for the next one.
So you do not need to know how to grow courgette before you start: the app takes you through every step.
For the full product details, see the climbing courgette in the shop.
Level 1: pre-germinate the seeds
Courgettes are true summer vegetables. The seeds only germinate above 20°C, and the seedlings are very sensitive to lower temperatures.
That is why you start them indoors around late April or early May. Plant the young plant in your raised bed around late May. Because the plants grow quickly, you can also start them in late May. The plant can then move outside sooner.
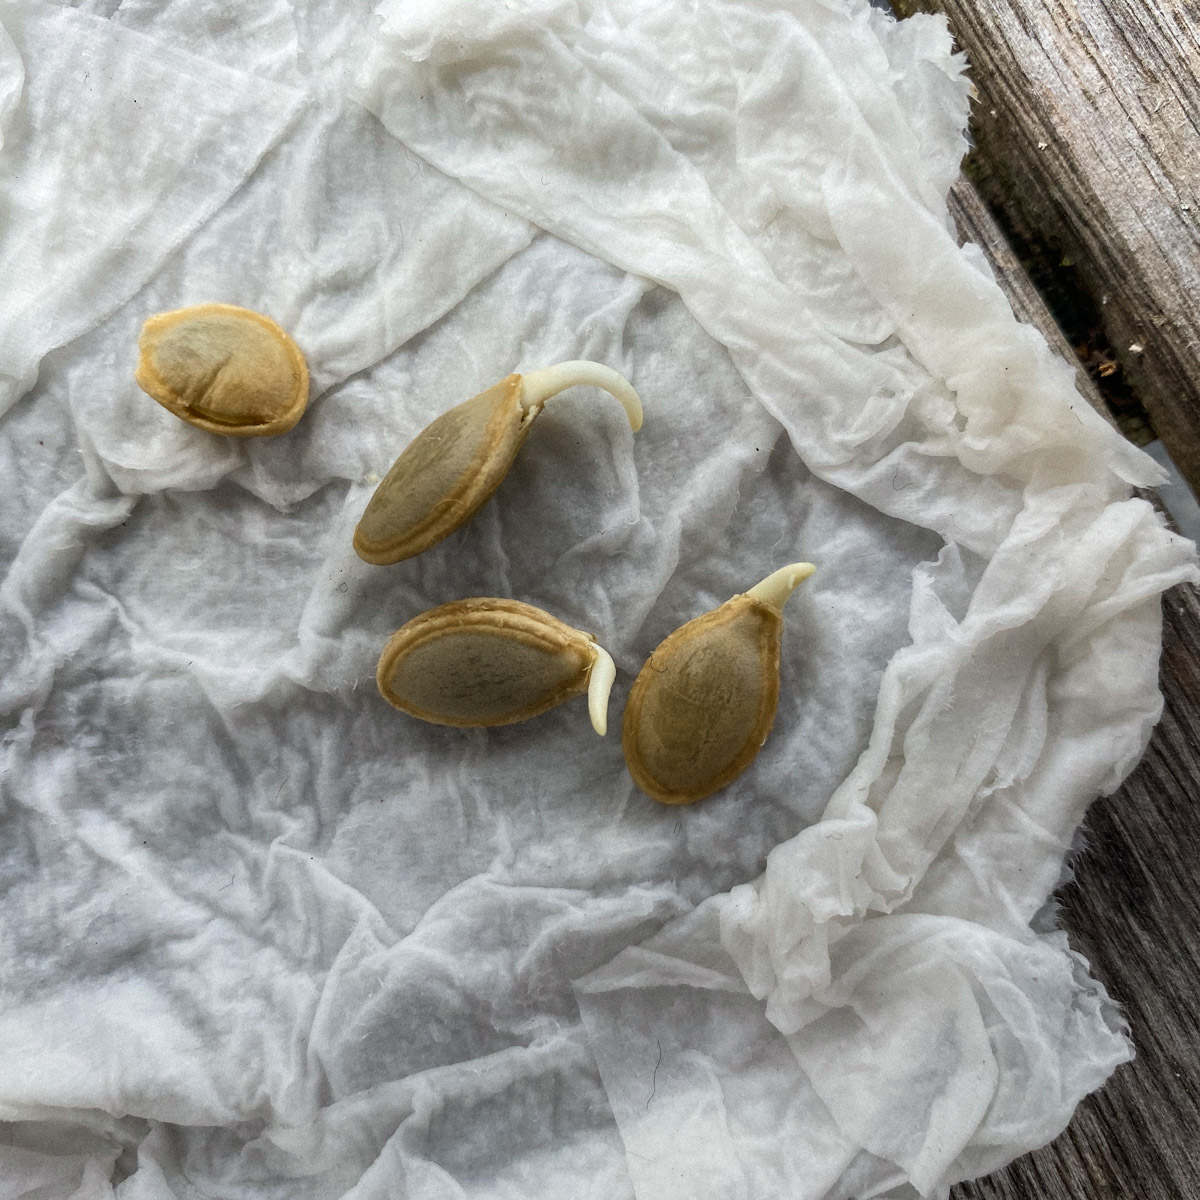
Before sowing the seeds in a pot, let a small root appear first. This is called pre-germinating, and it lets you know that the seeds are germinating properly.
It is simple: fold a piece of kitchen roll or toilet paper a few times, moisten it (damp, not wet), and place it in a small container.
Check now and then to see whether a root has appeared. Sometimes you will see one after 2 or 3 days, but it often takes longer. Some seeds can take more than 10 days.
That is why you start them indoors around late April or early May. Plant the young plant in your raised bed around late May. Because the plants grow quickly, you can also start them in late May. The plant can then move outside sooner.
Before sowing the seeds in a pot, let a small root appear first. This is called pre-germinating, and it lets you know that the seeds are germinating properly.
It is simple: fold a piece of kitchen roll or toilet paper a few times, moisten it (damp, not wet), and place it in a small container.
Check now and then to see whether a root has appeared. Sometimes you will see one after 2 or 3 days, but it often takes longer. Some seeds can take more than 10 days.
Level 2: Sow the pre-germinated seeds in Airpots
You need:
- pre-germinated seeds
- large MM Airpots, one per seed
- MM seed-starting mix or MM coconut seed-starting mix
- clear kitchen film, unless you use coconut mix
Note: MM coconut seed-starting mix does not contain plant food. Add one heaped tablespoon of MM plant food when you first prepare it.
Fill the Airpots with seed-starting mix and moisten it.
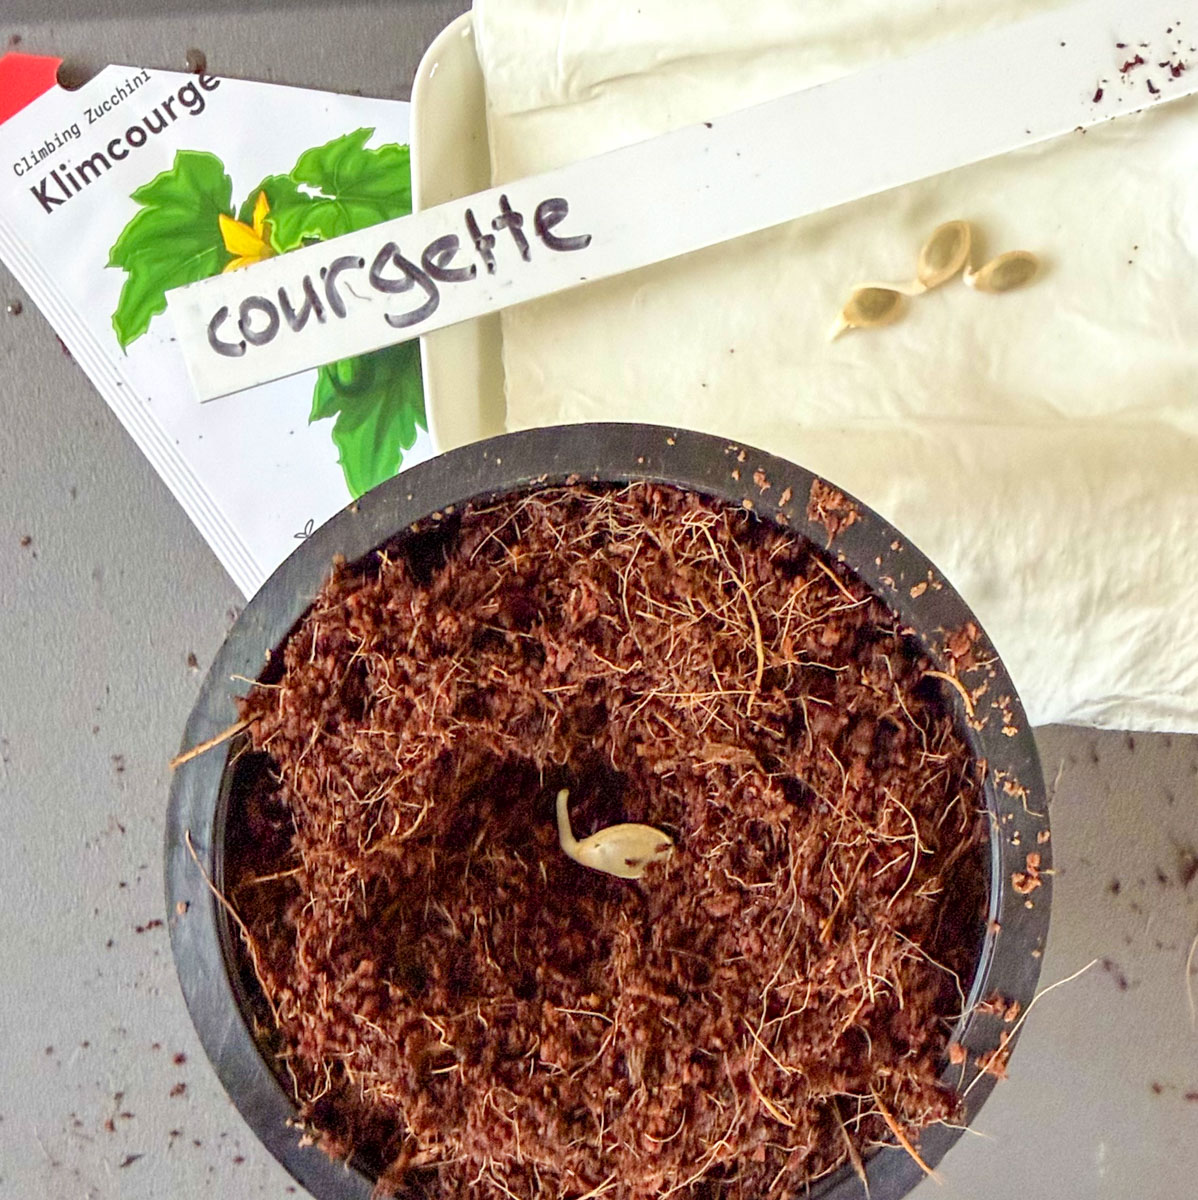
Make a generous hole about 1 cm deep. Carefully place the seed in it without damaging the tiny root. Close the hole and cover the Airpot with kitchen film to keep the mix moist. You do not need film with coconut mix.
Put the pot in a warm place indoors, away from radiators and direct sunlight.
Fill the Airpots with seed-starting mix and moisten it.
Make a generous hole about 1 cm deep. Carefully place the seed in it without damaging the tiny root. Close the hole and cover the Airpot with kitchen film to keep the mix moist. You do not need film with coconut mix.
Put the pot in a warm place indoors, away from radiators and direct sunlight.
Level 3: courgette seedlings
As soon as you see the seedling appear, you know things are going well. Remove the film from the pot if needed and put it in the brightest spot you have, but preferably not somewhere too warm.
Keep the mix moist and turn the pot a quarter turn every day. This prevents the seedlings from growing crooked.
After another 5 days or so, it is time for the next level.
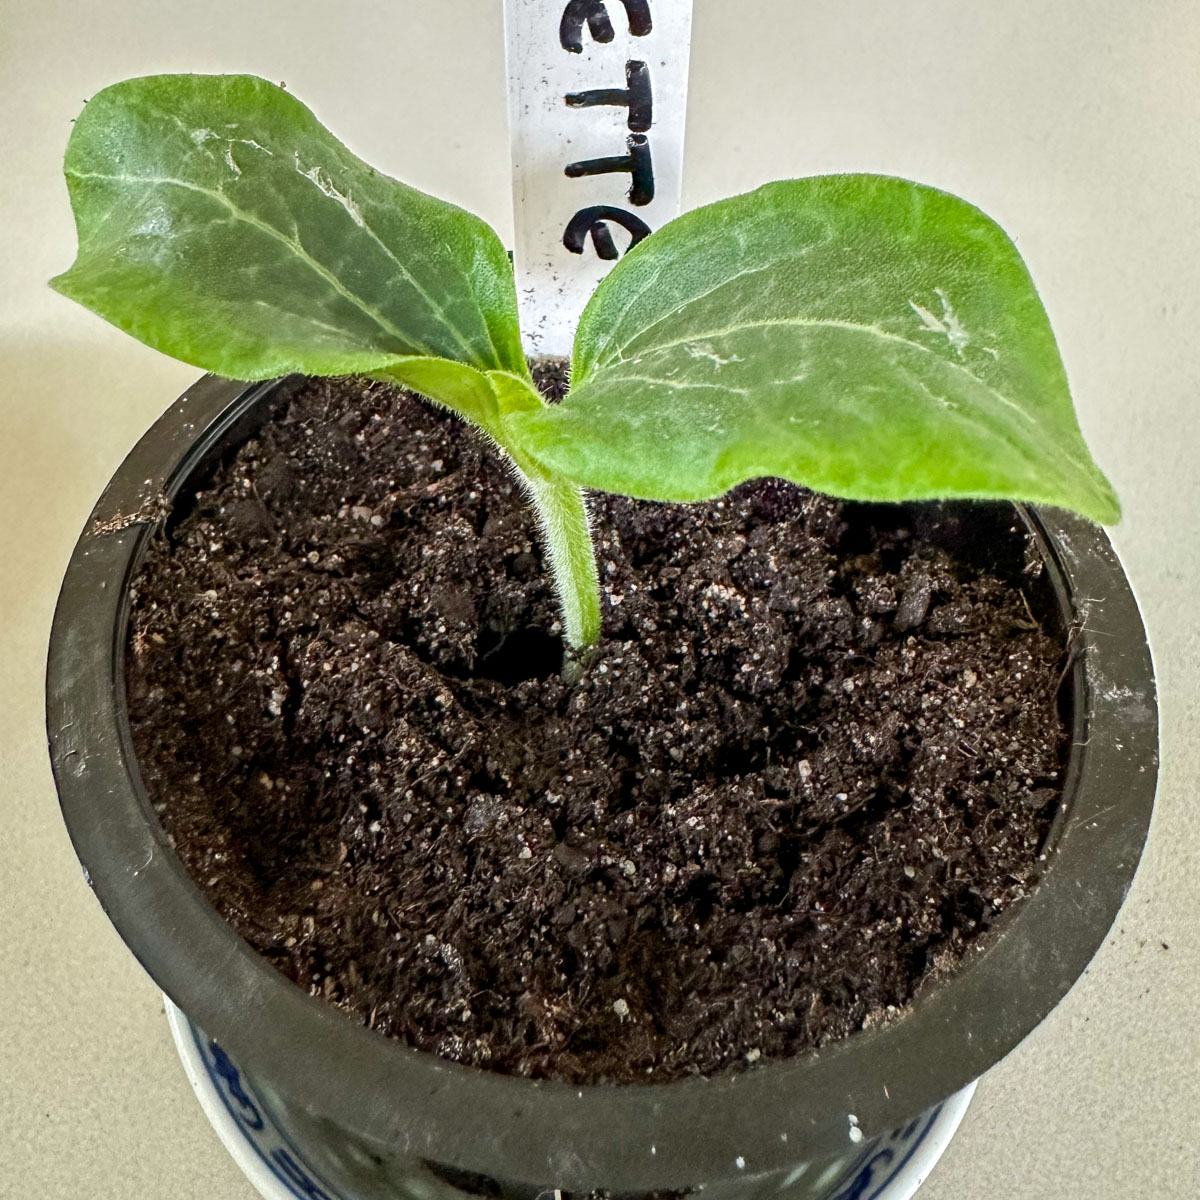
Level 4 and 5: care for your plants on the windowsill
To help your plant grow well, put it in full light, but keep it below 20 degrees C.
The seedling soon grows into a real little plant. Turn the pot a quarter turn every day so it does not grow crooked. It is also important to keep the mix moist, but not soaking wet.
The seedling soon grows into a real little plant. Turn the pot a quarter turn every day so it does not grow crooked. It is also important to keep the mix moist, but not soaking wet.
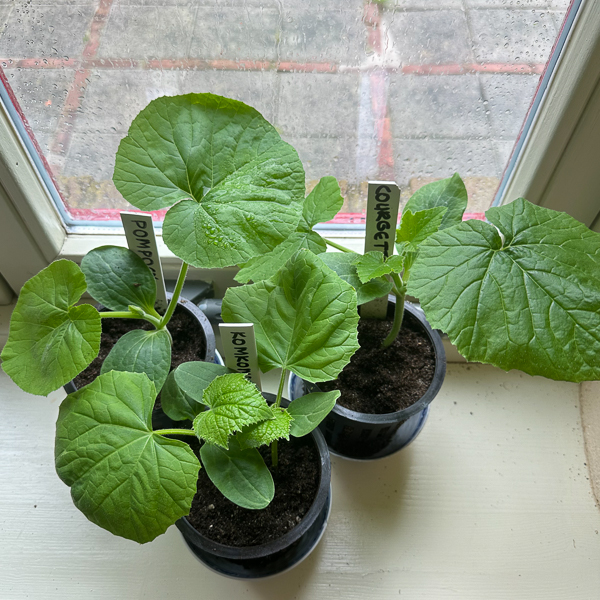
Level 6-10: harden them off outdoors
Around mid-May, let the plants get used to outdoor air: a little longer each day.
In the final level they stay outside all day, and you only bring them back indoors at night.
In the final level they stay outside all day, and you only bring them back indoors at night.
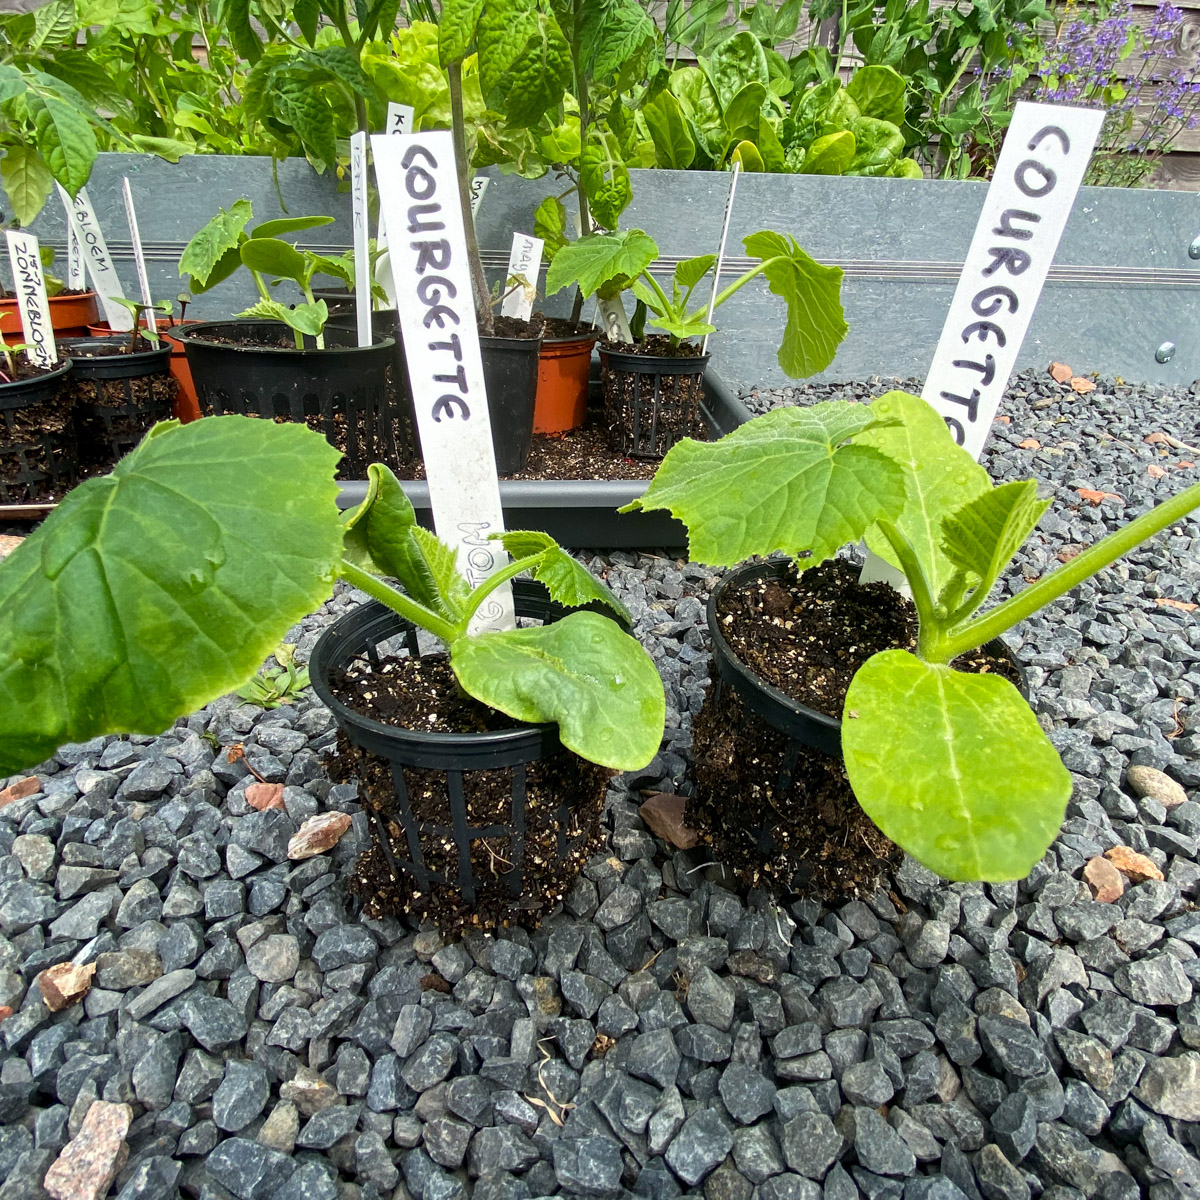
Level 11: Plant the strongest courgette in your Makkelijke Moestuin raised bed
Once your plant is used to the outdoor air, choose the strongest one and transplant it into your outdoor raised bed. Place it at the back by the trellis.
To help the plant get going, add 2 tablespoons of extra MM plant food to the planting hole before putting the plant in.
To help the plant get going, add 2 tablespoons of extra MM plant food to the planting hole before putting the plant in.
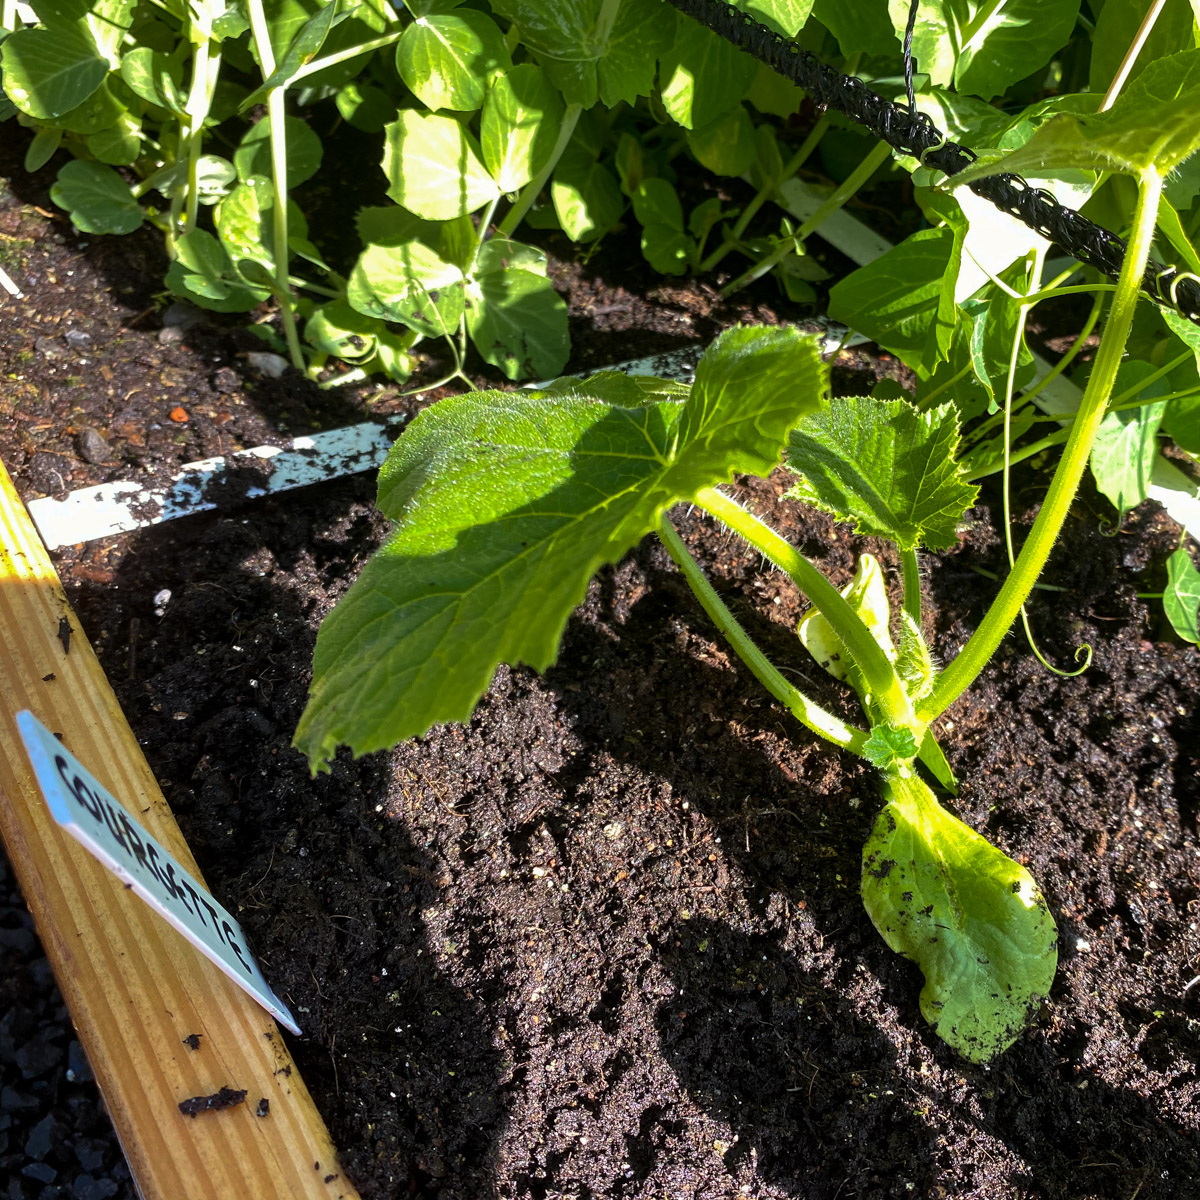
Level 12 and 13: care and trellis
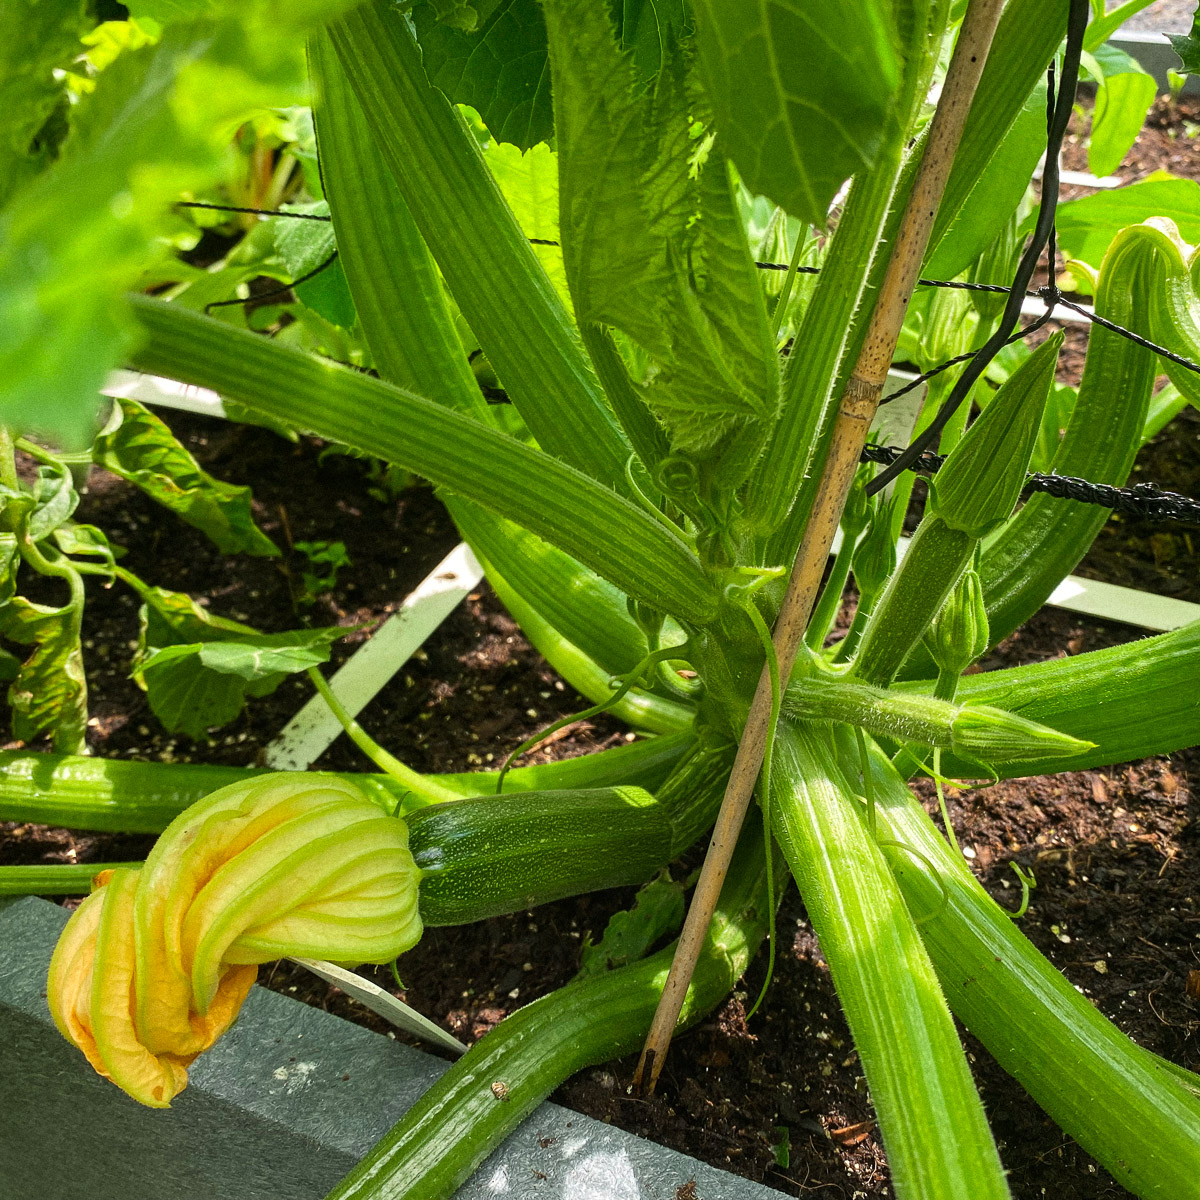
During these levels, it may still be fairly cool and the plant may not grow very quickly yet. Make sure it grows upwards and not sideways. If needed, place a small stick beside it to guide it towards the trellis.
Water every day when the weather is dry. A climbing courgette does not grip the trellis net by itself, so tie it to the net with string, clips, or plant ties.
Water every day when the weather is dry. A climbing courgette does not grip the trellis net by itself, so tie it to the net with string, clips, or plant ties.
Level 14: flowering and pollination
Your plant will start flowering quite soon. Courgettes have both male and female flowers: the male flowers only have a stem, while female flowers have a swelling under the bud where the fruit forms.
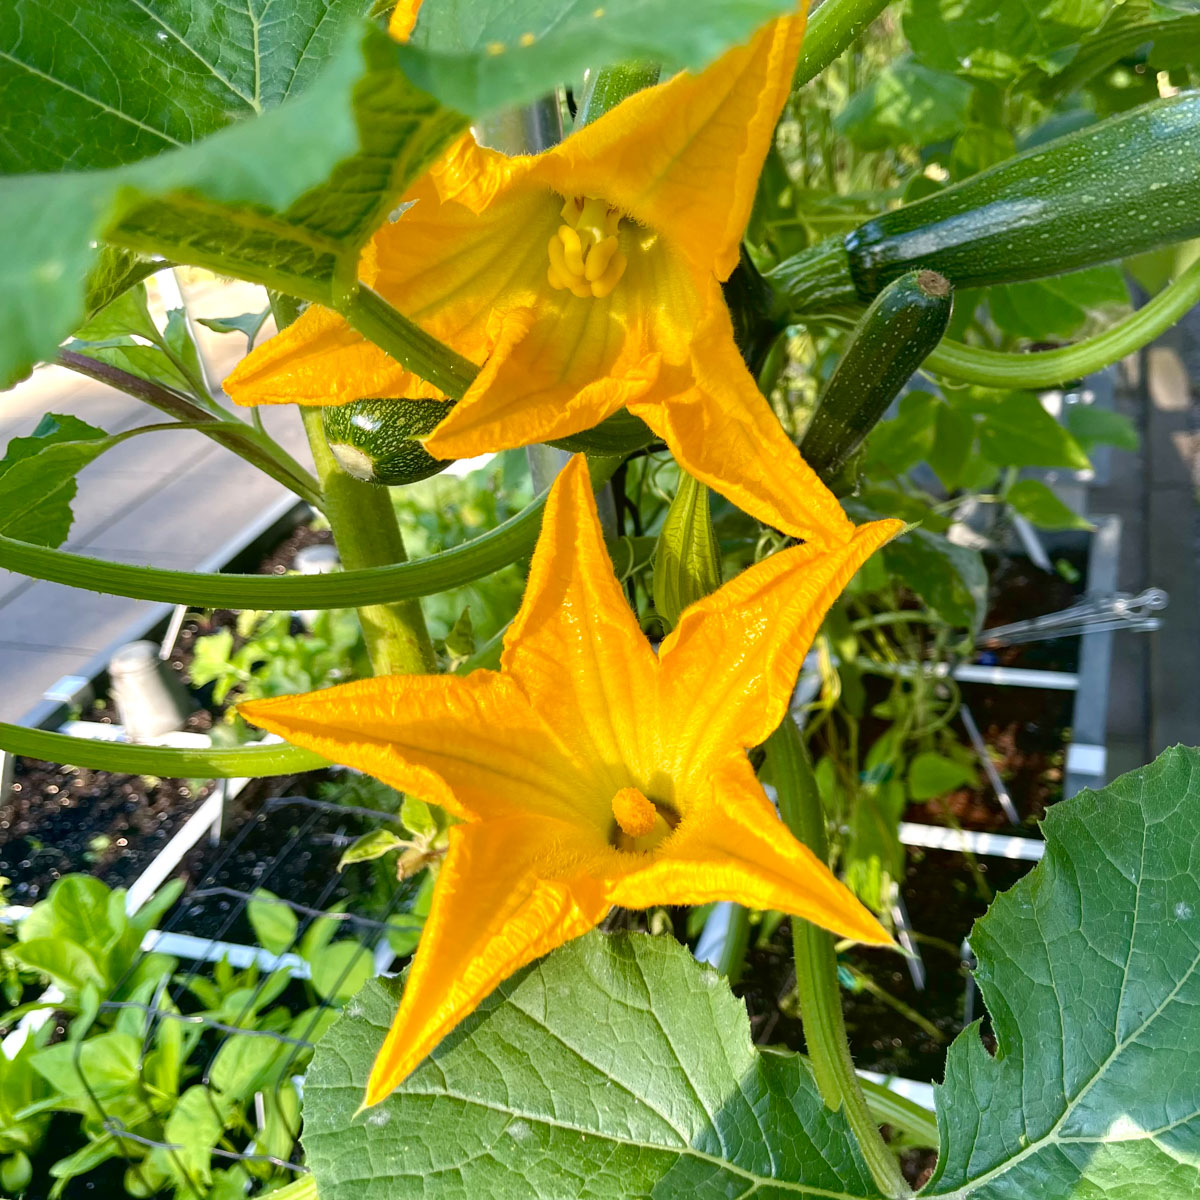
Bees and bumblebees are meant to pollinate the female flowers with pollen from the male flowers.
If that does not happen, the tiny courgette or pumpkin may fall off before it really starts growing. Unfortunately, there are fewer bees than there used to be. To be sure, you can also pollinate the flowers yourself:
If that does not happen, the tiny courgette or pumpkin may fall off before it really starts growing. Unfortunately, there are fewer bees than there used to be. To be sure, you can also pollinate the flowers yourself:
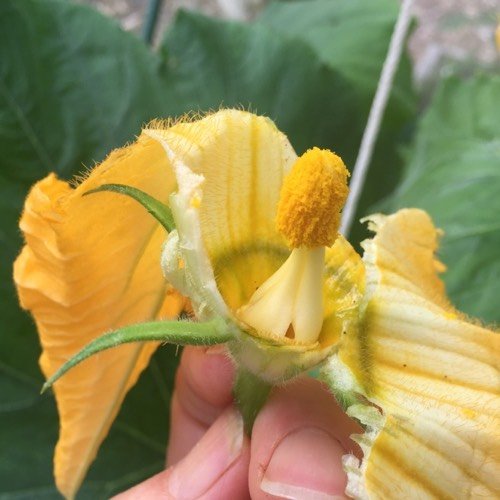
As soon as a female flower opens, pick a male flower and remove the petals. They are tasty in salads, or you can add them to a smoothie.
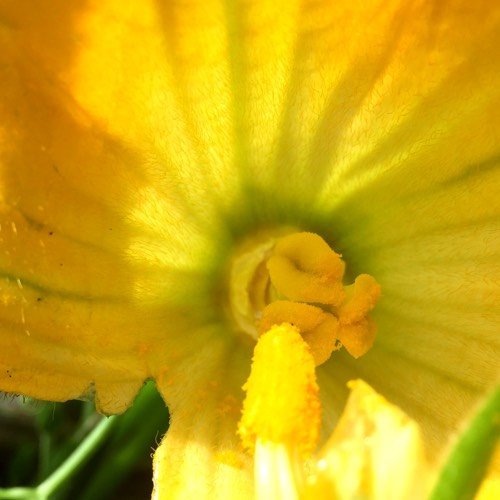
Then rub the large stamen along the stigma of the female flower.
That is it: the flower is pollinated, and the courgette can start growing.
The next levels: harvesting
With a bit of good weather, you can harvest the first courgettes in early July. They taste best when they are 20 to 30 cm long. Picking them early also encourages more flowers and therefore more fruit.
Cut them off with scissors at the short, thick stem. That gives you the smallest chance of damaging the plant.
Cut them off with scissors at the short, thick stem. That gives you the smallest chance of damaging the plant.
Growth and extra plant food
Once the first courgettes are growing, sprinkle one scoop of extra plant food (30 ml, or 2 tablespoons) around the base of the plant every four to five weeks. The app will remind you.
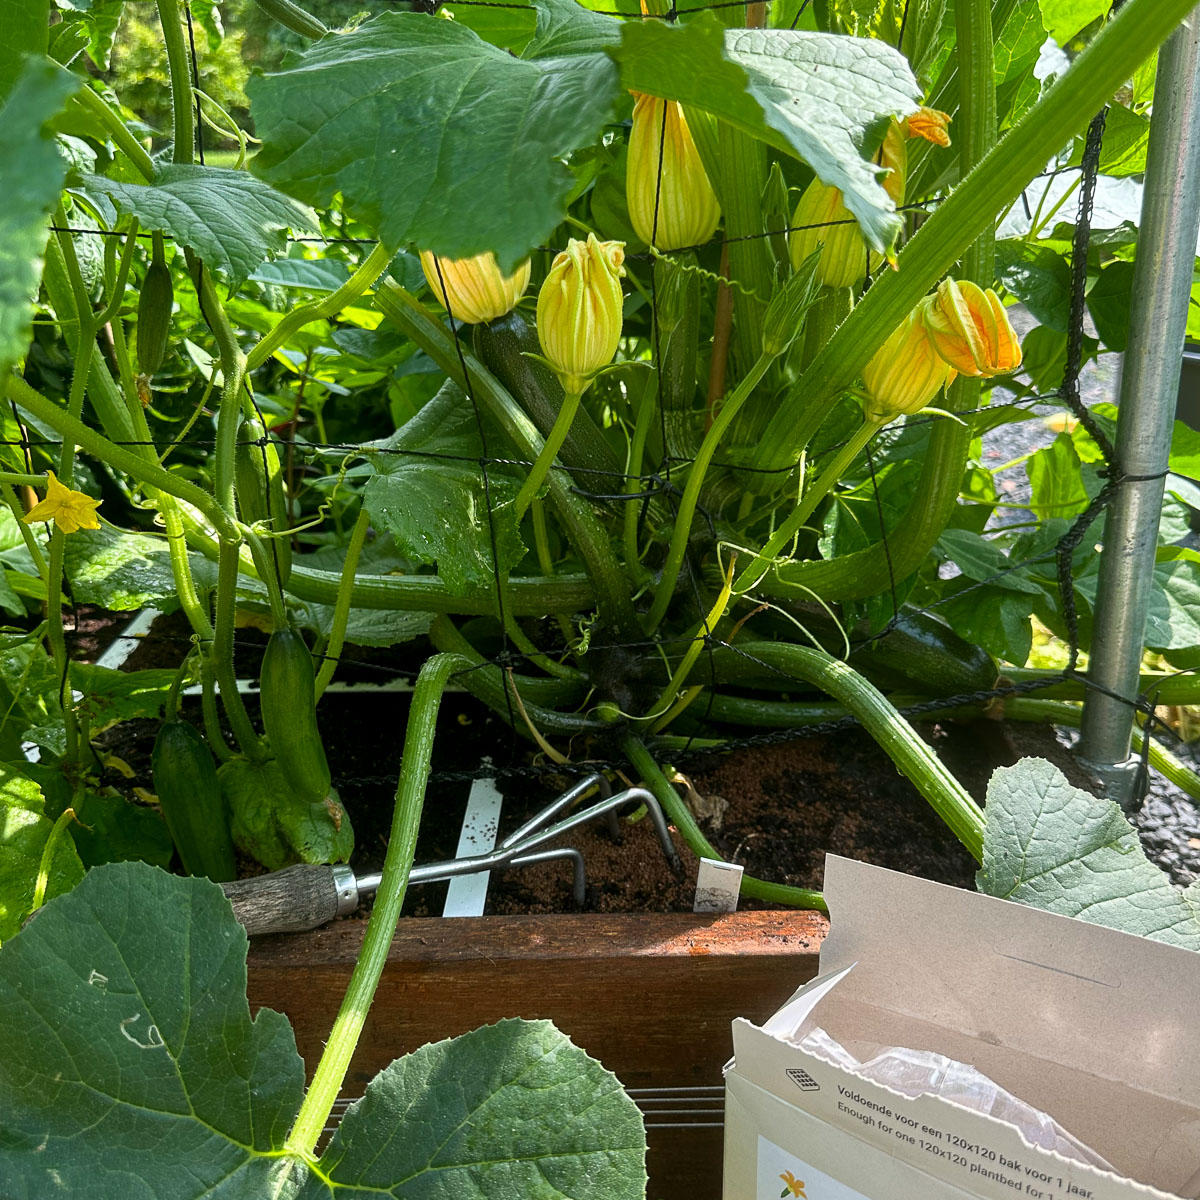
The plant grows tall: in a greenhouse it can quickly reach around two metres or more, and in a warm summer it can do that outdoors too. Tie it to the trellis regularly.
You can keep harvesting until the first frost, or a little longer if you protect your plants from the cold.
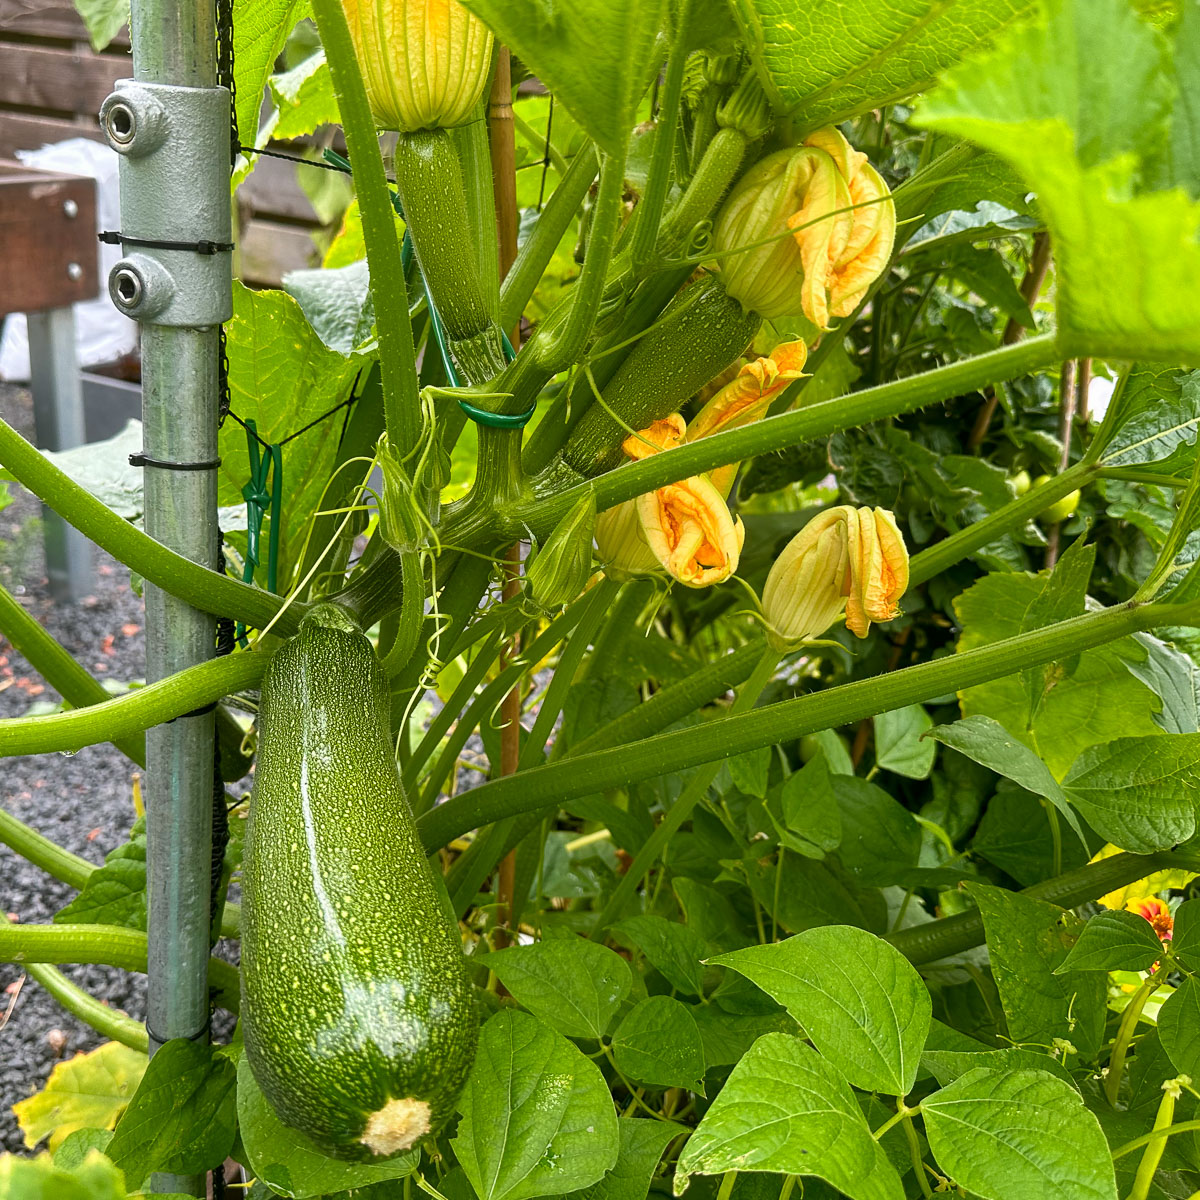
Courgettes can be slow to get started, especially if the weather is still cool when you put them outside. But once they settle in, not much can go wrong.
Sometimes the small courgettes fall off before they start growing. They probably have not been pollinated, or the plant is getting too little plant food.
Read more about that here.
In autumn, you will almost always see mildew. By then, it is rarely a real problem.
Sometimes the small courgettes fall off before they start growing. They probably have not been pollinated, or the plant is getting too little plant food.
Read more about that here.
In autumn, you will almost always see mildew. By then, it is rarely a real problem.
How can you use courgette?
You can use courgettes in all sorts of ways: briefly boiled, stir-fried, grilled on the barbecue, diced into an omelette or pasta sauce, or made into soup.
Small courgettes can be eaten raw in salads, just like the flowers.
You can also use them as a pizza topping, as Atalanta does:
Small courgettes can be eaten raw in salads, just like the flowers.
You can also use them as a pizza topping, as Atalanta does:

Courgettes provide potassium, fibre, vitamin C and several B vitamins. They also contain vitamin A and the carotenoids lutein and zeaxanthin.
They are a light, versatile vegetable that works well in many meals.
They are a light, versatile vegetable that works well in many meals.
So, what is stopping you from sowing and growing courgettes yourself?
Our courgettes are delicious, produce an enormous harvest, and are great fun to grow yourself. Plus, with our app and materials, it is almost impossible to go wrong 🙂
Good luck!
Good luck!
Good luck!